
Mould and clay casting
If you want to go a step further and create a ceramic cup from your 3D printed cup, you first need to make a plaster mould. The mould is a negative form of the original 3D printed cup. In this mould you pour casting clay to create a clay version of the cup. Because of the absorbing properties of plaster, the liquid from the casting clay that touches the mould, gets absorbed by the plaster causing the clay to dry, creating a thin layer. After pouring out the remaining liquid clay you will end up with a nice hollow clay cup. Leave it in the mould to dry further and then release it.
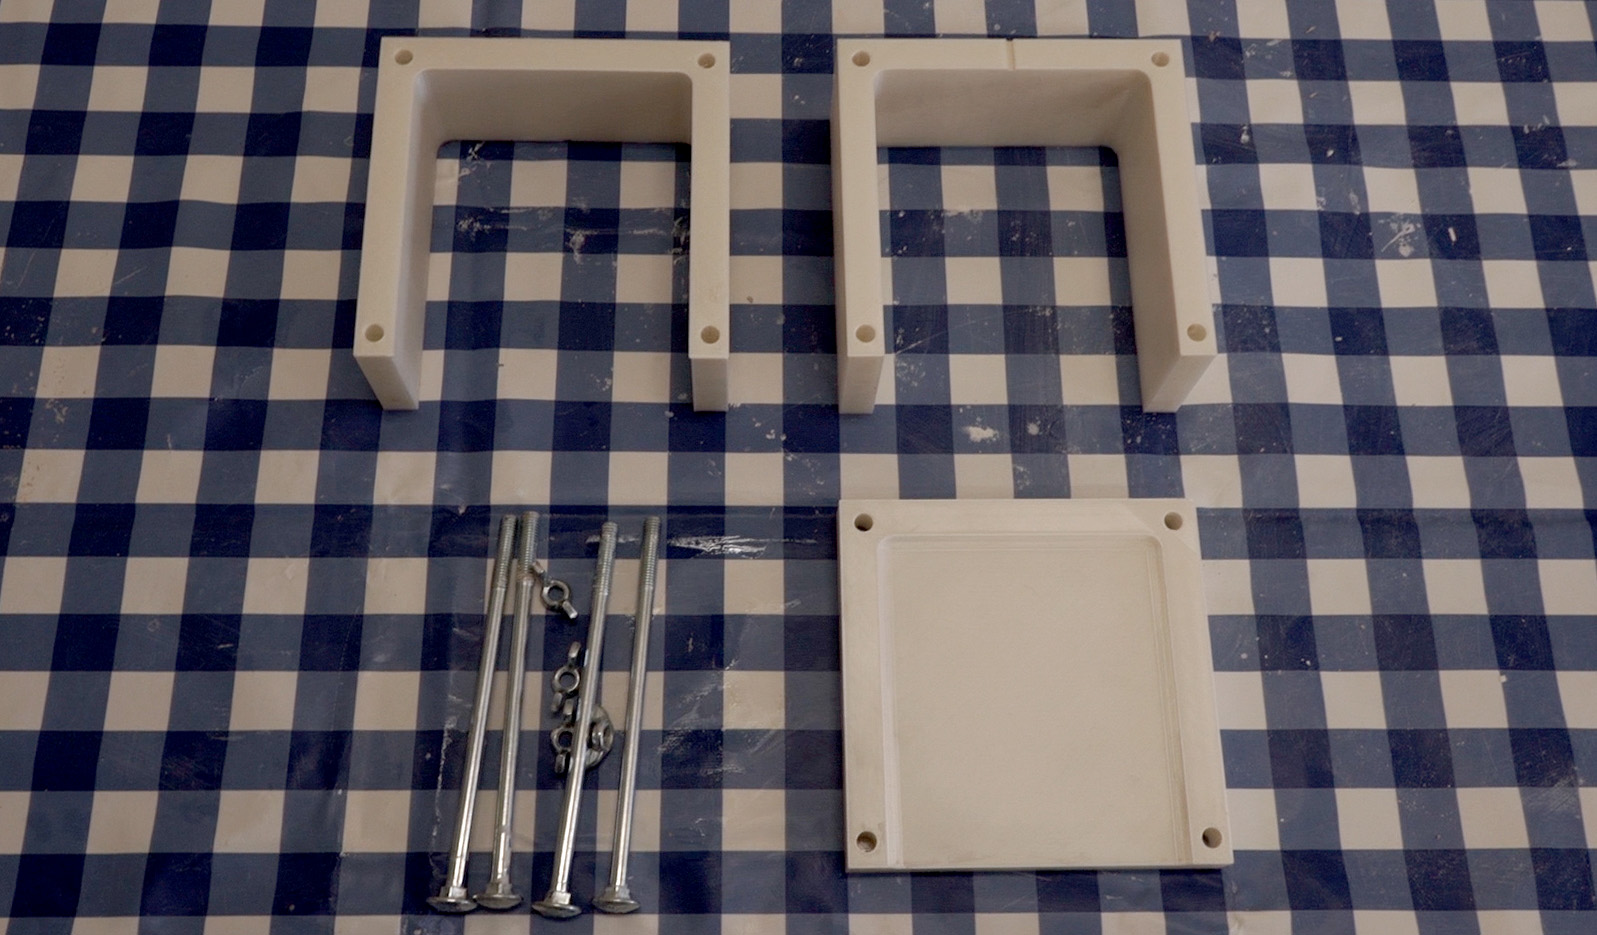
We created a 3-part mould frame to simplify the mould making. You can easily assemble and disassemble the frame with the bolts and reuse the frame for the next mould. You can find the 3D files of the frame here. The bolts are 160mm long and have diameter of 8mm. We use wing nuts to tighten them.
To keep the 3D printed cup in position we use clay and a wooden skewer. Before 3D printing the cup model, we create a tiny hole in the bottom of the cup with 3D modelling software (Cinema4D). The wooden skewer can be put through the tiny hole in the mould frame and the point of the skewer goes in the tiny hole of the cup. By tightening the bolts the skewer stays in position. The cup is squeezed on top of a tile of clay that we cut in the size of the mould frame. We use clay because the top of the cup is not always exactly flat.

Watch the video below for clay casting in action.

We use a two-part mould because the generated cups are not symmetrical and the shapes can be either concave or convex. If we would use a single part mould there is a considerable chance the original model gets stuck in the mould. The parts are cast in two sessions. To make sure that the parts connect and fit well together, you create small holes in the first plaster part. We did this by sinking small clay balls in the top layer of the still liquid plaster. Next you wait until the plaster of the first part is dry. For the second part, get rid of the small clay balls, clean the plaster and brush a thin layer of green soap or vaseline on top of the plaster part. This layer is needed to make sure that the second part is easily released from the first part. Once the second part is dry, disassemble the mould frame and gently release the two plaster parts from the 3D printed cup.

After the two mould parts are released from the mould frame and are thoroughly dry, they are ready to be used for clay casting. The parts can be kept together by clamps or strapping. For our experiments we used ready-made casting clay bought at a ceramics specialist store. Pour liquid clay in the mould and let it stand for about 20 minutes. Pour the left-over liquid clay back into your clay bucket. Now you can see the first result of your cup. The plaster absorbed the liquid from the clay and left a nice thin layer. Let the mould stand until the clay is dry enough to be taken out without deformation. Gently release the two mould parts and cautiously take out your clay cup. Let the cup dry for at least 10 days before baking it in a kiln.
